Cabinet assembly is the process of connecting all parts including panels, doors, drawer boxes, slides, hinges, and handles into a functional and durable product. With clear instructions and proper tools, anyone can achieve professional results. In recent years, Ready to Assemble (RTA) cabinets have become a leading choice among homeowners, contractors, and distributors for their affordability, easy transport, and flexible installation. Packed flat to optimize container space and reduce shipping costs, RTA cabinets offer efficiency and higher profit margins for large scale projects. This guide provides essential steps, tools, and expert tips to help assemble RTA cabinets accurately and efficiently
1. Preparing Tools Before Starting the Cabinet Assembly
Before starting, preparation is the key to successful cabinet assembly. Having the correct tools and a clean workspace will make every step easier and ensure your cabinets fit together perfectly.
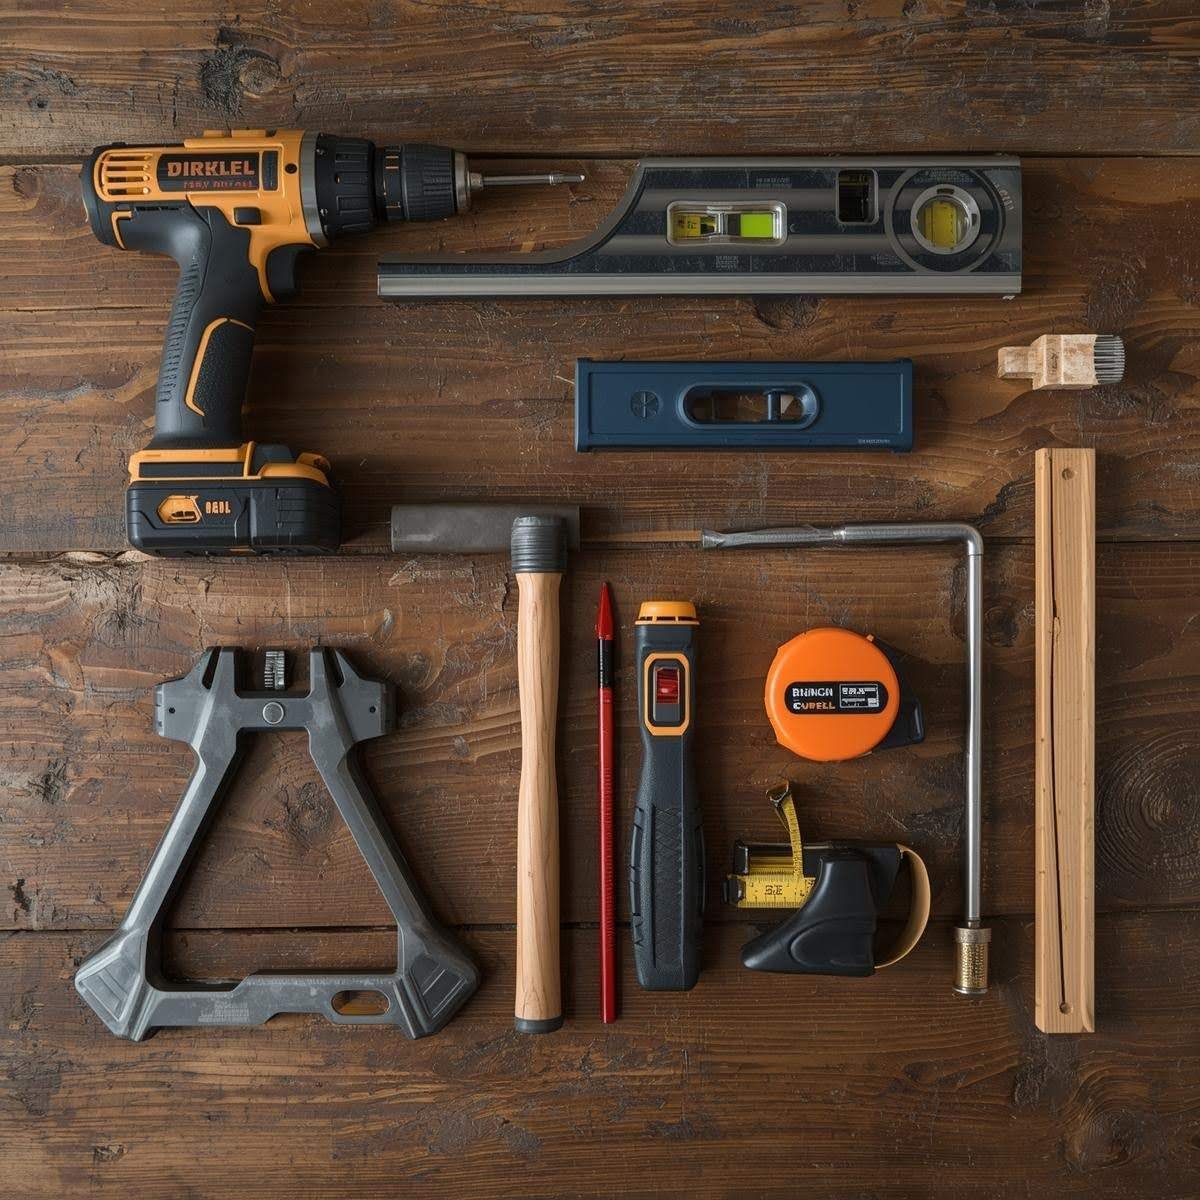
You will need a drill for fastening screws, a screwdriver for fine adjustments, a rubber mallet for tapping joints gently, a measuring tape for accurate alignment, and a level to ensure everything is straight. Clamps and a square ruler are used to hold the panels tight while maintaining precise angles. Wood glue can be used if you want extra strength for joints. Gloves and a soft cloth are useful for protecting your hands and keeping surfaces clean during the process.
Choose a flat, stable, and well-lit area to work in. Make sure there is enough space to lay out all the cabinet parts. Before beginning, unpack all components and arrange them in groups such as side panels, top panels, bottom panels, back panels, doors, drawers, and hardware. This organization helps you visualize the steps ahead and avoids confusion later.
Proper preparation at this stage prevents mistakes and makes the rest of the assembly smooth and efficient.
2. Step-by-Step Cabinet Assembly Process
2.1. Unpack and Check All Components for Cabinet Assembly
Once you open the boxes, check every part carefully before starting your cabinet assembly. You should have all panels, hardware, and accessories according to the packing list. If any piece is missing or damaged, do not start assembling. Instead, contact your supplier for replacement. Each component should be clearly labeled to help you identify parts easily and assemble with confidence. This step marks the beginning of your DIY cabinet assembly journey, ensuring everything is ready for smooth progress.
2.2. Sort and Organize Panels Before You Assemble RTA Cabinets
Lay the parts on the floor or a large table according to their position in the cabinet. Grouping panels by type makes the process much faster. For example, keep side panels together, top and bottom panels in one section, and back panels separately. You can use masking tape to mark each part if you are working on multiple units. Having everything visible at once helps you understand the overall structure before continuing your cabinet assembly guide. Proper organization is key when learning how to assemble RTA cabinets efficiently.
2.3. Assemble the Cabinet Frame Using Essential Cabinet Assembly Tools
Begin building the cabinet frame by attaching the bottom panel to the two side panels. Use cam locks or dowel pins to connect them firmly — these are essential cabinet assembly tools. Ensure the corners are perfectly square using a level or a ruler. If desired, apply a thin layer of wood glue along the edges before tightening the joints for extra stability.
Do not overtighten screws, as this may crack the wood or deform the panels. Once this step is complete, your cabinet will start taking shape, forming a strong base for the remaining DIY cabinet assembly steps.
2.4. Attach the Back Panel – Key Step in the Cabinet Assembly Guide
The back panel gives the cabinet structure and helps it stay square. Depending on the design, it might slide into grooves or be attached using screws or nails. Make sure the panel fits flush with all edges. Check both diagonals with a measuring tape to confirm the cabinet is perfectly aligned.
A misaligned back panel is one of the most common reasons for uneven doors and drawers later, so take a few extra minutes to get this step right. Once secured, your cabinet becomes significantly more rigid and stable — a crucial milestone in any cabinet assembly guide.
2.5. Install Drawer Slides and Hinges for Smooth DIY Cabinet Assembly
After the main box is assembled, install the drawer slides and door hinges using suitable cabinet assembly tools. Mount the slides inside the cabinet using the pre-drilled holes. Ensure both sides are perfectly parallel and at equal height to allow the drawers to open smoothly.
Next, attach the hinges to the door panels. Insert each hinge cup into the pre-drilled 35-millimeter holes and lightly tighten the screws. Do not fully secure them yet; final adjustments will be made once the doors are attached to the cabinet. Accurate drilling and proper measurement make this step easier for anyone following a cabinet assembly guide.
2.6. Attach Doors and Drawers to Complete Your Cabinet Assembly
Insert the drawers into the slides and test their movement. They should glide effortlessly without sticking or scraping. If they do not move evenly, check the alignment of the slides and adjust slightly. Then attach the doors to the cabinet body using the hinges installed earlier. Adjust the hinge screws to make the gaps between doors even and ensure they close properly.
For soft-close hinges, make sure they work smoothly and prevent slamming. A well-adjusted door gives your cabinet a professional and elegant finish. This stage can take some time, but patience is essential for anyone learning how to assemble RTA cabinets to achieve a precise, durable result.
2.7. Final Inspection and Cleaning After DIY Cabinet Assembly
After everything is assembled, go over every connection one more time. Tighten any loose screws and confirm that the cabinet is standing straight. Use a soft cloth to clean off dust, glue residue, or fingerprints.
A properly completed cabinet assembly should be firm, level, and visually seamless. When done right, your RTA cabinet will look identical to a pre-assembled factory product, ready for installation or use. This marks the successful completion of your DIY cabinet assembly, proving that with the right cabinet assembly tools and a clear cabinet assembly guide, anyone can achieve professional results.
3. Tips for a Smooth DIY Cabinet Assembly
Even though RTA cabinets are designed for easy installation, there are ways to make the job simpler and more precise. Always start with the base cabinets first because they serve as the foundation for wall cabinets. Label all the parts to avoid confusion. Read the instruction manual carefully before starting since each manufacturer can have slight design differences.
Do not rush through the process. Tighten screws gradually, checking alignment after each step. Use a level frequently to maintain balance. If possible, work with another person so one can hold the pieces while the other secures them. These small details can save you time and ensure a perfect final result.
Following these habits will turn your first DIY cabinet assembly into a successful and enjoyable project.
4. Common Mistakes and How to Avoid Them
Several mistakes occur during cabinet assembly, but most of them can be avoided easily. The first common issue is misaligned panels caused by not checking with a level during assembly. Always confirm alignment before tightening. Another frequent error is using too much glue, which can spill out and damage the finish. Only a small amount is needed to hold the panels securely.
Some installers forget to check the position of the back panel, causing the cabinet to tilt. Others install hinges incorrectly, which makes doors hang unevenly. To prevent these problems, stay patient, review the manual as you go, and verify each connection carefully.
Small adjustments made early can save a lot of time and frustration later. A properly aligned cabinet not only looks better but also lasts longer and functions smoothly.
5. Maintenance and Care After Cabinet Assembly